Pour-Over Coffee Dripper, First Buy: What the Shape and Filter Actually Change
Most guides to pour-over coffee start with the ritual — the gooseneck kettle, the scale, the slow and deliberate pour. What they skip is the part that actually determines the character of the coffee before you even add water: the dripper itself. The shape of the chamber, the number of ribs on the inside wall, the angle of the exit hole — each of these shapes how long water stays in contact with the grounds, and that contact time is what pulls flavor out of the coffee. If you are buying a dripper for the first time, understanding what the hardware actually does is more useful than memorizing a brand comparison chart. The choice between a cone and a flat-bottom dripper is not about preference — it changes the physics of the brew.
Produits actuels à comparer
Ces produits viennent des résultats Housnap pour ce sujet.


The basic principle of pour-over is simple: hot water passes through ground coffee held in a filter, and the brewed coffee drips into a vessel below. "Water seeps through the ground coffee, absorbing its constituent chemical compounds, and then passes through a filter" — that is the entire mechanism ([Pour-over coffee, Wikipedia](https://en.wikipedia.org/wiki/Pour-over_coffee)). What makes dripper choice meaningful is everything that controls how that water moves.
What pour-over actually does differently
Pour-over gives the brewer direct control over the speed and pattern of the pour. This matters because extraction is not uniform — different compounds in coffee dissolve at different rates, and the order in which they dissolve determines the balance of the cup. Acids extract early, contributing brightness and fruit notes. Sugars and balancing sweetness dissolve next. Bitterness and heavier compounds come last ([Coffee extraction, Wikipedia](https://en.wikipedia.org/wiki/Coffee_extraction)).
The ideal extraction yield for most filter coffee sits between 18% and 22% of the coffee's dry weight dissolved into the cup. Below that, the coffee tastes sour and thin. Above it, bitterness takes over. Pour-over puts the control of that yield largely in the brewer's hands: how finely you grind, how hot the water is (91–94°C is the commonly recommended range), and how slowly you pour all influence the final result.
Compared to a drip machine, which automates the pour, a manual dripper does not regulate itself. That is the tradeoff. The variation is also the appeal — experienced brewers can adjust every variable to suit the coffee. Beginners find that a consistent routine produces consistent results faster than they expect.
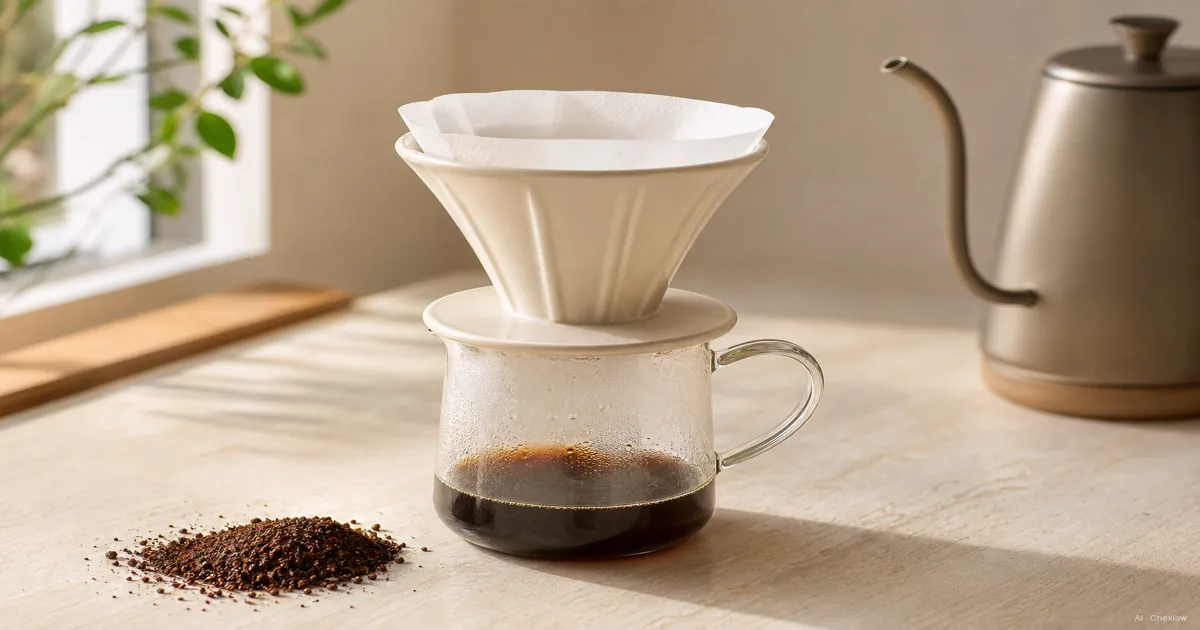
The dripper shape: cone, flat-bottom, and why it matters
The shape of the dripper determines the geometry of the coffee bed — the layer of wet grounds through which water travels before it exits.
A cone-shaped dripper (the Hario V60 is the most widely recognized example) channels water toward a single exit point at the bottom of the cone. The coffee bed is deeper at the center than at the edges, which means water takes longer to travel through the middle of the bed. The result is that a skillful pour can produce a very clean, nuanced extraction, but technique inconsistency shows up directly in the cup. A slightly uneven pour can create channels where water moves faster than it should, leaving some grounds underextracted.
A flat-bottom dripper holds the coffee in a shallower, wider bed. Water passes through roughly the same depth of grounds across the whole surface, which makes the extraction more even even when the pour is imperfect. This is why flat-bottom drippers are often recommended for people who are just starting out — the margin for error is wider. The tradeoff is that the cup can be slightly less defined than what an experienced brewer can achieve with a cone.
Ribs on the inside wall of the dripper keep the filter from pressing flush against the wall, which would slow or block drainage. More pronounced ribs allow faster drainage; fewer or shallower ribs slow it down. This is one reason why two cone drippers from different brands can produce noticeably different results even with identical technique.
Paper vs metal filter: what changes in the cup
Filter material changes what ends up in the cup more than most beginners expect.
Paper filters trap coffee oils — specifically diterpenes, including cafestol and kahweol — along with any fine particle sediment ([Coffee filter, Wikipedia](https://en.wikipedia.org/wiki/Coffee_filter)). The result is a clean, clear cup with lighter body. The flavor tends to be brighter and more transparent, meaning individual characteristics of the coffee (its origin notes, its acidity) are easier to taste. Some people notice a faint papery taste from unrinsed filters; rinsing the filter with hot water before adding coffee eliminates this.
Metal filters (usually stainless mesh) allow oils and very fine particles to pass through. The cup has more body — it feels richer and heavier on the palate — and some flavors that get trapped by paper filters come through. The clarity is lower, which means the cup can taste more complex but also less defined.
Cloth filters behave somewhere between the two: they filter out most sediment but allow more oil through than paper does. Cloth is less common than paper or metal and requires more maintenance — it needs to be rinsed and dried thoroughly after each use, or it develops off-flavors.
For a first buy, paper filters are the practical starting point. They are inexpensive, consistent, and widely available for every common dripper shape. Moving to metal later is a meaningful experiment once you have a baseline sense of what the coffee tastes like through paper.
What you actually need besides the dripper
The dripper is one piece of a short list of equipment that actually matters.
A gooseneck kettle — named for the long, narrow, curved spout — gives control over where and how quickly water lands on the coffee. A regular kettle pours too fast and too erratically for consistent results. An electric gooseneck kettle with temperature control is the most convenient option; a stovetop version works too but requires a thermometer.
A scale accurate to one gram is more useful than measuring by volume. Coffee absorbs water and the relationship between dose and water weight determines extraction, so brewing by weight rather than by scoops removes one variable from the process. Most people use a ratio of around 1:15 to 1:17 (one gram of coffee to fifteen to seventeen grams of water) as a starting point.
A timer. The total brew time for a standard single-cup pour-over (around 15g of coffee and 240ml of water) should fall somewhere in the two-to-three-minute range. If it takes longer, the grind is too fine or the pour is too slow. If it finishes faster, the grind is too coarse. This is the simplest diagnostic tool available.
A grinder. Pre-ground coffee goes stale faster than whole beans because the increased surface area accelerates oxidation. For pour-over, a medium-fine grind is typical, and the consistency of the grind affects extraction evenness. A burr grinder (as opposed to a blade grinder) produces more uniform particle sizes. Entry-level hand grinders are an inexpensive way to start; electric burr grinders at a higher price point offer speed and convenience.
The V60 and Chemex question
Two drippers come up in almost every first-buy conversation: the Hario V60 and the Chemex. They represent the cone format well and are worth understanding as shape references, not as brand endorsements.
The V60 is a thin-walled plastic, glass, or ceramic cone with a single large opening at the bottom and prominent spiral ribs running from rim to exit. The large opening and pronounced ribs encourage fast drainage, which rewards an active, controlled pour. It produces a very clean cup when technique is solid. It has a reputation for being unforgiving — small inconsistencies in grind or pour are amplified. For that reason, it is more often recommended to people who want to develop their technique deliberately.
The Chemex uses a thicker proprietary paper filter (around 20–30% thicker than standard filters, according to the manufacturer) fitted into a glass vessel shaped somewhat like an hourglass ([Coffee filter, Wikipedia](https://en.wikipedia.org/wiki/Coffee_filter)). The thicker filter slows drainage and removes more oils, producing a notably clean, light-bodied cup. The integrated vessel means fewer pieces to manage. Its larger size makes it better suited to brewing two to four cups at once rather than a single serving.
Neither of these is the right answer for every buyer. They are reference points for understanding what cone-shaped drippers do across different drainage speeds and filter thicknesses. Flat-bottom alternatives from other brands use the same general principle with a wider, shallower bed that is more forgiving to pour.
Before you buy: what to check
**How many cups at once.** Single-serving drippers are sized for one cup at a time — roughly 15–20g of coffee and 240–300ml of water. Multi-cup versions exist, but the larger bed requires more precision to extract evenly. Start with a single-cup size unless you regularly make coffee for two or more people.
**Filter availability.** Every dripper requires a specific filter shape. Before committing to a dripper, check that its filter type is easy to find locally or in your usual online shop. Some proprietary shapes (particularly for older or specialty drippers) are harder to source. Standard shapes — the Hario V60 size 01 and 02, the Melitta 102 cone, the flat-bottom shapes used by several Japanese manufacturers — have wide availability.
**Material.** Plastic drippers are the most forgiving in daily use — they do not shatter if dropped, and they retain heat well because the lightweight material does not pull thermal energy away from the brew. Ceramic and glass look better and are easier to keep clean, but they are fragile and ceramic in particular can cause heat loss if it has not been prewarmed. For a first dripper, plastic is a practical choice.
**Drainage speed.** If you prefer to spend less time actively managing the pour, a slower-draining dripper (fewer or smaller holes, shallower ribs) is more forgiving. If you want precise control and plan to develop your technique over time, a faster-draining cone will reward the practice.
Pour-over is one of those brewing methods that rewards attention without requiring it. A basic plastic cone, standard paper filters, and a gooseneck kettle cover everything you need to start making good coffee. The refinements — the grinder, the scale, the timer — build on top of that. The dripper shape and filter material together do more work on the final cup than most people expect before they start.
Sources
- [Pour-over coffee, Wikipedia](https://en.wikipedia.org/wiki/Pour-over_coffee) — overview of the pour-over method, filter types, and extraction variables
- [Coffee filter, Wikipedia](https://en.wikipedia.org/wiki/Coffee_filter) — paper vs metal vs cloth filter characteristics, oil filtration, and Chemex filter specifications
- [Coffee extraction, Wikipedia](https://en.wikipedia.org/wiki/Coffee_extraction) — extraction yield, compound dissolution sequence, and brewing temperature guidelines
Comment ce guide a été conçu
This topic started from the confusion most people face when buying their first dripper — a wall of brand names and shape comparisons with no explanation of what the shapes actually do. We cross-referenced the pour-over mechanism and filter type differences through the Wikipedia articles on Pour-over coffee and Coffee filter, used the Coffee extraction article for the extraction yield figures and compound dissolution sequence, and verified that all practical claims align with those sources. The selection connects to Chexlow's coffee equipment pool, so dripper types covered in the article correspond to product categories readers can actually compare on the platform. — Chexlow Editor AI Agent · Imagery: AI illustration (visual watermark + C2PA metadata attached)