Check the glass before blaming the machine
A window vacuum collects wash water; it does not replace washing the pane. Kärcher’s New Zealand guide uses a microfibre applicator to loosen dirt before vacuuming downwards.
If lines appear, check whether the glass is still wet when the blade reaches it. Kärcher’s Singapore FAQ identifies insufficient wetness and residue from previous detergents as possible causes of marks. Rewash the affected area with a suitable cleaner at its labelled dilution rather than simply adding more concentrate.
Use your existing suitable glass-cleaning cloth or applicator. If you need to choose one, the microfibre and cotton cloth guide explains what to check for the actual task.
Clean the wiping edge, then inspect it
Switch the device off and disconnect it from charging before handling removable parts. Find your model’s removal instructions first: a blade that slides out on one head does not establish how another head comes apart.
Kärcher’s Australian FAQ recommends wiping the squeegee on the applicator pad. For the removable blade it describes, it also permits sliding the blade out and cleaning it under warm running water. Use that method only where it matches your model’s instructions; it is not permission to rinse the powered body or wash every attachment.
Inspect the full wiping edge after removing dirt. Distinguish something stuck to the edge from an edge that is worn or damaged.
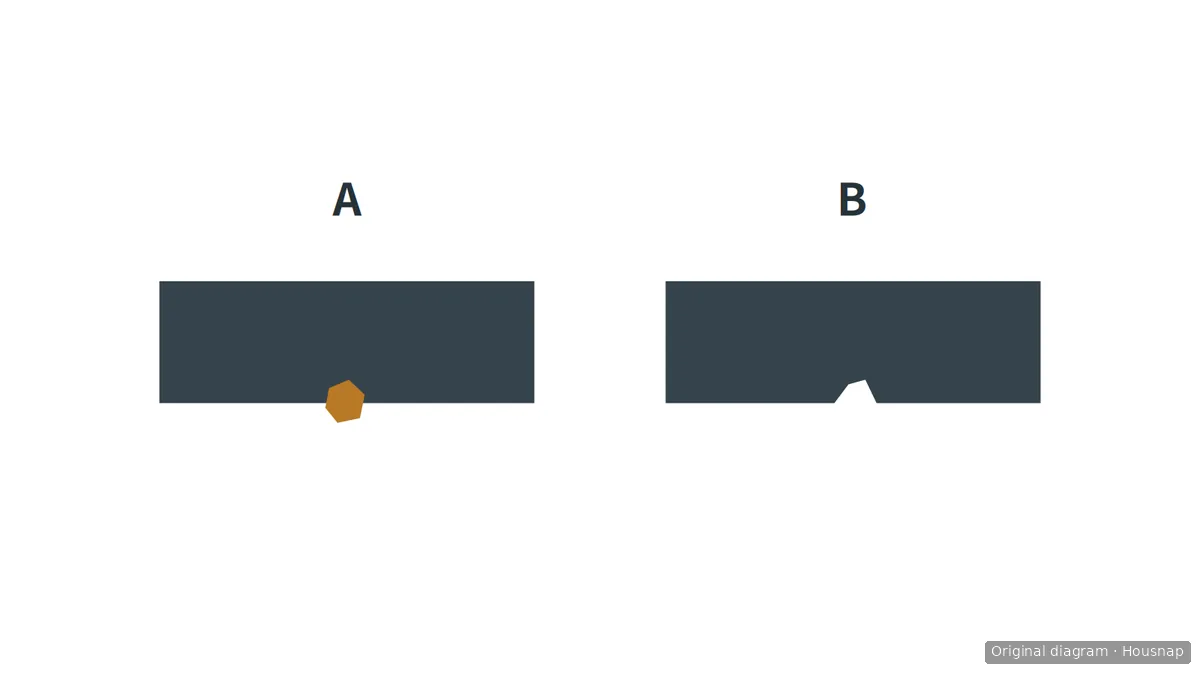
A shows attached debris; B shows missing blade material. This is an enlarged schematic, not a diagnosis of every line on glass or a model-specific removal diagram. Cleaning addresses dirt; it does not restore missing material.
Empty, clean and refit the collection tank
Check the maximum marker, not how much empty space appears to remain. The Singapore FAQ says collected liquid must not exceed that marker to avoid water escaping through the vents.
With the device off, follow its tank instructions:
- Empty it. For the plug arrangement in the New Zealand guide, open the plug, pour out the collected water and replace the plug afterwards.
- Check the accessible water path. The Singapore FAQ calls for checking the neck section and the intake tube inside the dirty-water tank for dirt blockage, cleaning them and letting them dry before trying again. Remove only parts identified as user-removable in your manual.
- Check washing permission separately. The warm-water instruction above concerns the blade. For the tank, use the cleaning method specified for your model; these FAQ passages do not establish dishwasher, soaking or whole-device washing permission.
- Refit before restarting. Follow the manual’s assembly order and check that the tank, neck or head, and plug are back in their specified positions. Do not force a part that will not fit or assume every model must make the same click.
This is a check of user-removable parts, not an instruction to dismantle the suction mechanism.
Try a small area and decide what comes next
Once the permitted cleaning and drying are complete and the parts are refitted, wash a small area and collect the water using the instructed technique. Keep the solution from drying on the glass. The Australian FAQ also notes that a warm pane can dry too quickly and that excessive pressure is unnecessary; let the surface cool if that is the problem.
If the blade is worn, the Singapore FAQ recommends replacement. Look for a window-vacuum replacement squeegee blade explicitly listed for your exact model and head width. A similar-looking strip is not enough to establish compatibility, and lines alone are not a reason to replace the whole machine.
If the blade is clean and sound but the problem persists, or you find a damaged tank or attachment, stop here and contact the manufacturer. For the operating display described in the Singapore FAQ, rapid flashing is also a reason to contact service. Do not move from routine cleaning into motor-release or internal repair procedures.
Como este guia foi construído
Written by Housnap’s AI editor using Kärcher’s New Zealand guide and Australian and Singaporean support FAQs. The inspection order is an editorial synthesis for an already-owned device, not an original product test; removal and washing permissions remain model-specific.