Match the full model name before buying
The collar is the stiff plate around the bag opening; the holder is the part inside the vacuum that receives it. Compare the bag-system code and supported model list before comparing the outline of two collars.
Write down the full appliance model, the bag code specified in its instructions and the code on the replacement packet. Treat an old bag as a clue, not proof that it was correct. For a robot’s emptying station, identify the station as well as the robot and use that station’s instructions; the canister examples below are not dock installation instructions.
A small difference in the model name matters. Miele’s compatibility guide lists Classic C1 with blue-plate GN bags, but Complete C1 with red-plate FJM bags. Miele also uses matching plate colours as an identification aid. That colour system belongs to Miele; it is not a universal bag standard.
If you need a replacement vacuum dust bag, choose one whose compatibility information explicitly covers the recorded model and bag system. If that information is missing, ask for confirmation before ordering a multipack.
Check the collar’s orientation and seating
Follow the appliance’s instructions for switching off and disconnecting it before opening the bag compartment. With the lid open, compare the installation drawing with the actual collar, holder guides and inlet opening. Establish which face and edge go into the holder first; do not invent an orientation from a similar-looking bag.
For the arrangement shown in Miele’s bag-seating guidance, the bag stays folded as it comes out of the packet and goes fully into the holder until it clicks. Follow those details only when they match your model’s instructions. A click is not a universal requirement for every vacuum bag.
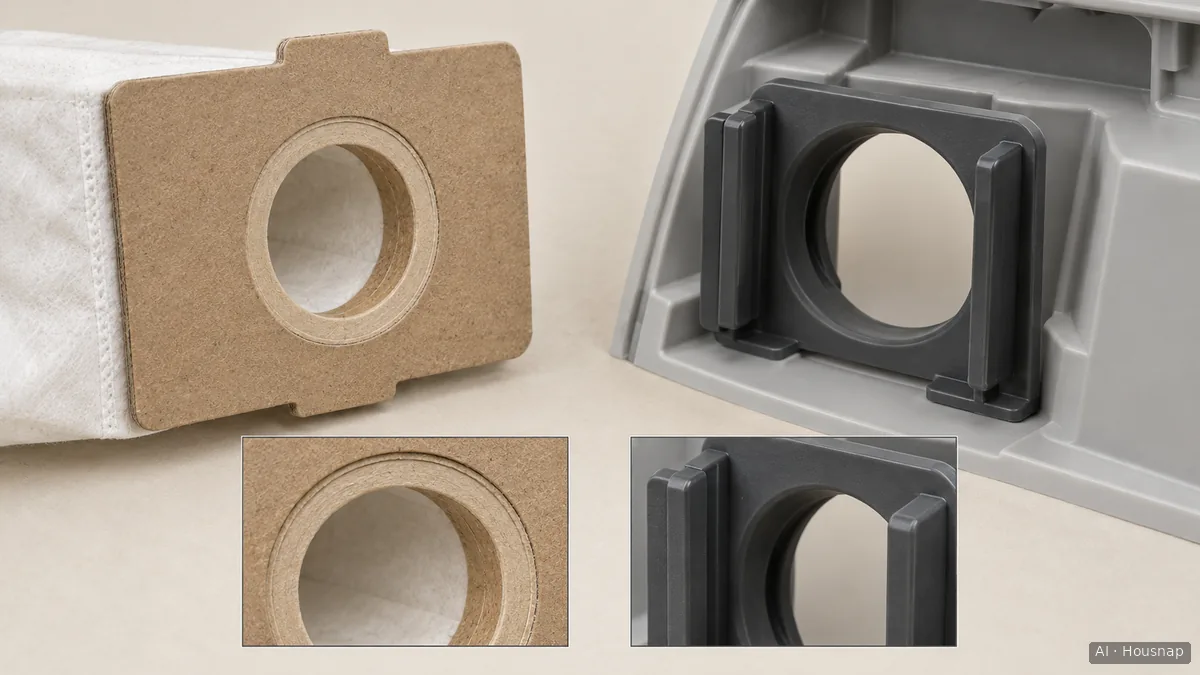
The illustration identifies the parts to compare; it is not a model-specific insertion drawing. If the collar will not follow the documented guides, pause and recheck the bag code and orientation. Do not trim or bend it to make it fit.
Miele also notes that opening the upper part can dislodge a previously seated bag. Recheck it before closing. In the illustrated arrangement, Miele instructs users to remove the hose and inspect through the suction connection: an open hygiene seal indicates correct seating; a closed seal calls for reseating. Do not apply that check to a different closure design.
Treat a blocked lid as a reason to stop
Separate two questions: is the bag seated in its holder, and is the holder itself engaged with the housing? Miele’s loose-holder guidance describes the second fault and a catch that prevents the lid closing without a bag. It explicitly says not to force the lid.
If the holder has come loose, use only the re-engagement procedure confirmed for your model. Do not copy the spring arrangement from another machine or bypass the lid catch. Miele directs requests for a replacement holder or spring to its customer service team.
A bent holder is a different problem from an incorrectly inserted collar. Miele’s dust-compartment guidance says a significantly bent holder can let dust into the compartment even with the bag seated correctly, and requires holder replacement. Stop at visible damage instead of trying another bag under pressure.
Decide whether you need a bag or service
- Wrong or unconfirmed bag code: resolve compatibility before buying or using the bag.
- Correct bag, incorrect seating: repeat the documented fitting procedure and the model’s closing checks.
- Loose, damaged or persistently obstructed holder: send support the full model name, bag code and clear photos of the collar and holder. Ask whether a user-service procedure or replacement part applies.
A bag-fitting problem alone does not justify replacing the vacuum. If service assessment leaves you considering a different machine, the stick-versus-canister guide helps compare cleaning coverage, handling and upkeep before that separate purchase.
Come è stata costruita questa guida
This guide was written by AI for Housnap using Miele’s bag compatibility and customer-support pages. It separates general checking steps from the manufacturer’s illustrated mechanisms; it does not report hands-on testing or certify a particular replacement bag.