Identify the lock and find the length limits
Start with the model name and its instructions. A visible lever clamps the outside of the shaft; a twist lock secures the sections internally. Some poles combine different mechanisms. Montbell distinguishes these systems, including lower sections with a lock button that are not intended for length adjustment.
Find the length scale and any STOP or MAX marking on each adjustable section before extending it. Do not pull beyond the marked limit to reach a preferred handle height. Cascade Mountain Tech’s FAQ describes a section coming completely out after being pulled past STOP. If the markings are unreadable, ask the manufacturer how to identify the permitted range.
For the telescopic poles covered by that FAQ, Cascade suggests adjusting the sections equally, with your arm resting by your side and your elbow at roughly a right angle when holding the grip. Treat this as a starting position for an ordinary walk, within your model’s limits. Do not assume every pole’s lower section is adjustable or copy another model’s maximum length.
Adjust an external lever with the lever open
Use the adjustment instructions for your particular clamp. LEKI’s Speed Lock guidance gives this sequence:
- Set the length. Open the lever, slide the section to the chosen position on the scale and close the lever firmly.
- If it closes too easily and the section slips. Open the lever again, tighten the tension adjustment a little, then close and check again.
- If it will not close. Loosen the adjustment slightly. Do not force the lever shut.
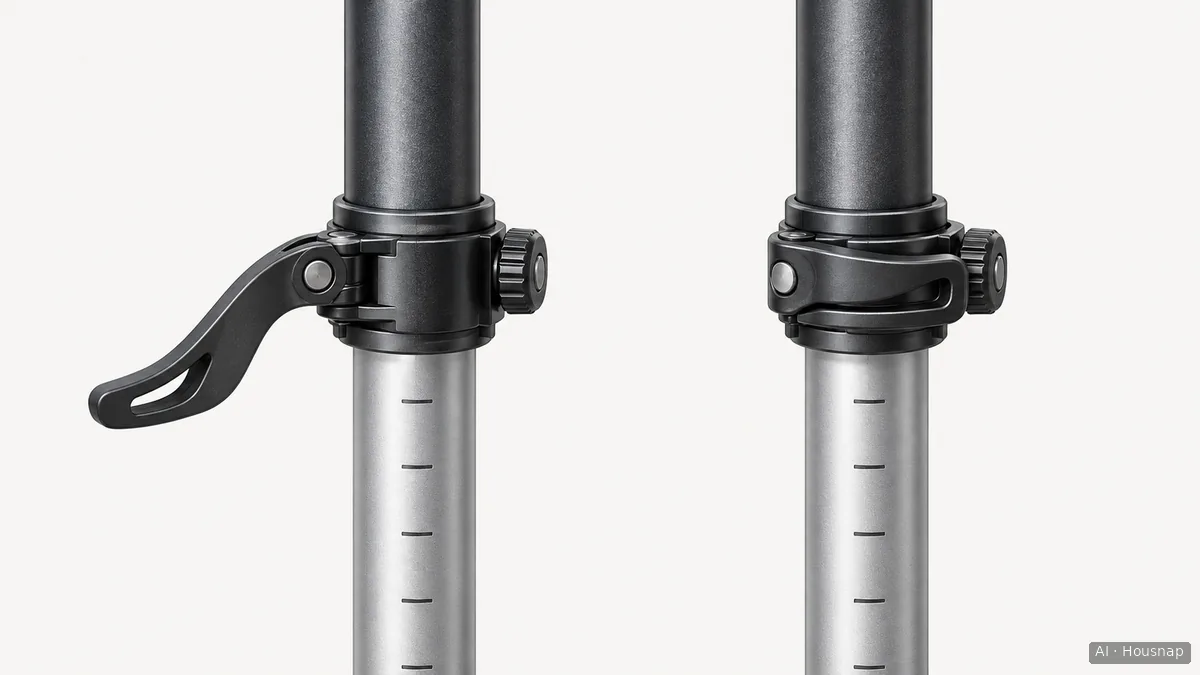
The illustration shows the two lever positions, not the exact hardware on your pole. Find the adjustment screw or wheel in your own instructions before turning anything. A model that needs a particular tool should be adjusted with that specified tool; this is not a reason to buy a general repair kit.
Cascade’s quick-lock instructions likewise begin with unlatching the lock before tightening its thumb screw. These examples support the same basic distinction: setting shaft length and adjusting clamp tension are separate operations.
Follow the model’s directions for a twist lock
A twist lock has no external lever to tension. Montbell explains that rotating the shafts expands an internal plastic stopper. First identify which section your manual tells you to hold, which to rotate and the unlocking direction; “turn clockwise” without that context is incomplete.
Release the lock as instructed, slide the section only within its permitted range, then relock it using the model’s directions. For the poles covered by its FAQ, Cascade specifically says to turn the upper section clockwise to engage the twist lock. Do not turn that into a universal instruction for every brand or viewing angle.
If it keeps rotating without gripping, stop the ordinary adjustment. Cascade describes internal troubleshooting separately and warns against taking the locking mechanism apart. This guide does not cover internal adjustment, replacing expanders or repairing a damaged shaft. Ask the manufacturer for the next step for your exact model.
Check every joint before setting off
LEKI says to check that both clamps hold before departure; Montbell also calls for inspection before use. Check each adjustable joint on both poles, rather than stopping after one lever feels firm.
- Length stays set. Use the hold check specified in your manual and watch the shaft markings for movement. A lever looking closed is not, by itself, the result of that check.
- Something slips or will not close. Return to the appropriate adjustment instructions. If the problem remains, set the pole aside and contact the manufacturer; do not keep adding tension indefinitely.
- A lever or shaft is damaged. Stop using the affected pole and request assessment. LEKI identifies cracked levers and clamps that will not hold as repair situations; more tightening is not a structural repair.
Cascade also recommends checking quick locks periodically for loosening. Recheck after changing length, and stop to investigate if a section starts moving during the walk.
For a useful support request, record the model, the affected joint and whether the problem is slipping, a lever that will not close or a twist lock that will not engage. That gives the manufacturer a concrete problem to assess before you buy parts or replace the pole.
Comment ce guide a été conçu
This guide was written by AI for Housnap, using LEKI, Cascade Mountain Tech and Montbell guidance. It separates model-specific instructions from the editorial scope of an ordinary pre-walk adjustment and check; no original product testing or human approval is claimed.