Pour Over Coffee Ratio & Recipe Guide: 1:15, 1:16, 1:17 Explained
You bought the dripper. You got the beans. And yet the cup keeps coming out flat, sour, or just not quite right. The missing piece is almost never the equipment — it's the ratio and the recipe. Once you understand why 1:15 tastes different from 1:17, what bloom actually does, and how grind size controls your brew time, every variable clicks into place. This guide gives you a repeatable framework to dial in your pour over from the first pour.
Disponibles ahora en una sola tienda
Por ahora, cada uno de estos productos está disponible en una sola tienda. La comparación de precios se abrirá con más tiendas.
Why Ratio Matters More Than You Think
Pour over coffee has no pressure to compensate for a weak dose. What you put in is exactly what comes out. That makes ratio — the weight of coffee to the weight of water — the single biggest lever you control before the first pour. Volume measurements (cups, tablespoons) vary by grind size and bean density. Grams don't. Always weigh both your coffee and your water.
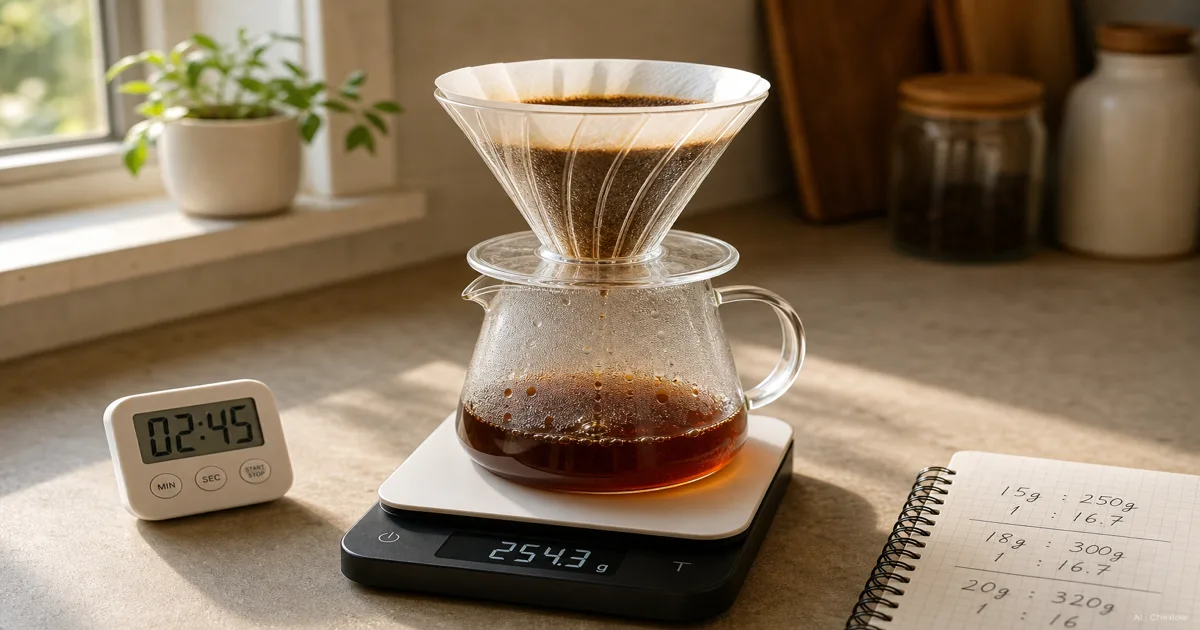
The standard range for pour over is 1:15 to 1:17 (coffee:water by weight). A 1:15 ratio means 15 grams of water for every 1 gram of coffee. For 20g of coffee, that's 300g of water.
1:15 / 1:16 / 1:17 — What Each Feels Like
1:15 — Strong and full-bodied. More coffee per unit of water means higher dissolved solids in the cup. You get more weight on the tongue, fuller sweetness, and a denser texture. Well-suited to medium and dark roasts where body is the point. Can tip into heavy if your extraction runs long.
1:16 — The balanced starting point. Most specialty cafés default here. It's forgiving across roast levels and origins, and clean pour over extraction means a slightly concentrated brew still tastes balanced rather than overwhelming. If you don't know where to start, start here.
1:17 — Light and bright. More water dilutes the cup and shifts the profile toward acidity and aroma. Works well for light roasts and single origins where the goal is clarity and floral notes rather than body. Easier to over-extract at this ratio if grind is too fine.
The rule: ratio controls strength. Grind controls extraction quality. Don't change both at once.
The Bloom (Pre-Infusion): Why It's Not Optional
Fresh coffee grounds are full of CO₂ — a byproduct of the roasting process. CO₂ is hydrophobic: it actively repels water and blocks even extraction. If you pour all your brew water straight in without blooming, CO₂ escapes mid-brew, creates uneven flow paths, and contributes a sour, gassy taste to the cup.
The bloom saturates the grounds just enough to let CO₂ escape before the main pour begins.
How to bloom:
- Use 2× to 3× the coffee weight in water. For 20g of coffee, that's 40–60g of water.
- Pour gently in a slow circle to wet all the grounds evenly.
- Wait 30 to 45 seconds. You'll see the bed rise and bubble — that's CO₂ releasing.
- The bed should settle slightly before you begin your main pours.
Cutting bloom short (under 30 seconds) leaves CO₂ trapped, causing uneven extraction and flat or harsh flavors. Fresher beans need longer bloom time because they off-gas more aggressively.
Total Brew Time: The Target Window
For most pour over drippers, aim for a total brew time of 2:30 to 3:30 from first pour (including bloom) to the last drop falling through.
Dripper shape affects this:
- V60: Open drain, faster flow. Target closer to 2:30–3:00.
- Chemex: Thick filter, slower flow. Target 3:00–4:00.
- Kalita Wave: Flat bottom, three small holes, more forgiving. Target 3:00–3:30.
If your brew finishes in 2:00, it's running too fast — likely under-extracted (sour, thin). If it takes 5:00+, it's running too slow — likely over-extracted (bitter, dry).
Grind Size and Brew Time: The Direct Link
Grind size is your primary tool for hitting the target brew window.
Coarser grind → larger particles → less surface area exposed to water → water flows through faster → shorter brew time → brighter, more acidic cup (risk: under-extraction if too coarse).
Finer grind → smaller particles → more surface area → water flows through slower → longer brew time → more body, more bitterness (risk: over-extraction if too fine).
The relationship is sensitive. A 50–100 micron shift in grind setting can meaningfully change your total brew time. This is why grind consistency matters — a burr grinder produces uniform particles that behave predictably. A blade grinder produces a mix of fine dust and coarse chunks that brew unevenly by design.
Calibration logic:
- Cup tastes sour and thin, brew finished fast → grind finer
- Cup tastes bitter and dry, brew ran long → grind coarser
- Adjust grind one step at a time. If you also change ratio or water temperature, you won't know which variable fixed (or broke) the cup.
Adjust One Variable at a Time
This is the most important rule for dialing in any pour over recipe. Every time you change more than one variable at once — ratio, grind, pour rate, water temperature — you lose the ability to trace cause and effect.
Start with the recipe below. Brew it exactly. Taste it. Then change only one thing.
Baseline recipe to start from:
- Coffee: 20g
- Water: 320g (1:16)
- Water temperature: 90–96°C (lighter roast = hotter)
- Bloom: 40g water, 30–45 seconds
- Main pours: 2–3 pours in slow circles, finishing by 3:00–3:15
- Grind: medium (similar texture to coarse sand)
Once this baseline tastes right, then adjust ratio for strength or grind for extraction quality — never both in the same session.